Tutorial
You can download sample data here!
Apply augmentation to your medical image dataset in a few simple steps:
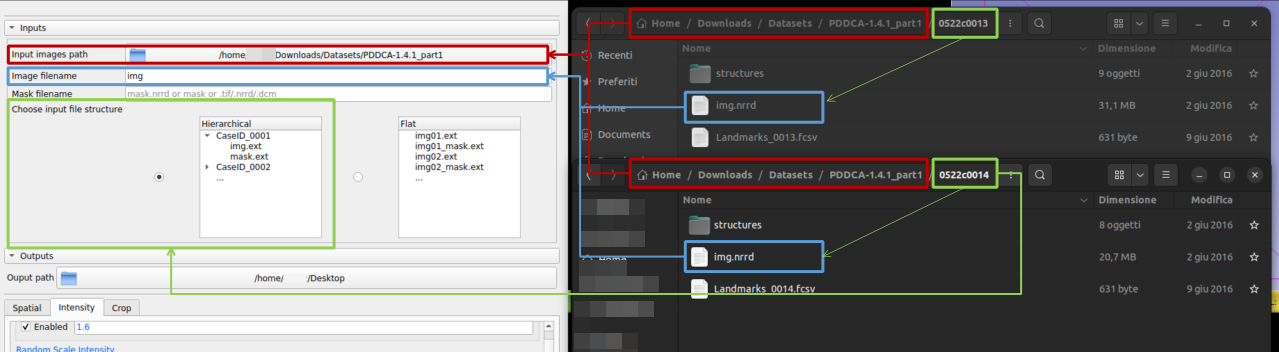
1. Choose the path of your images
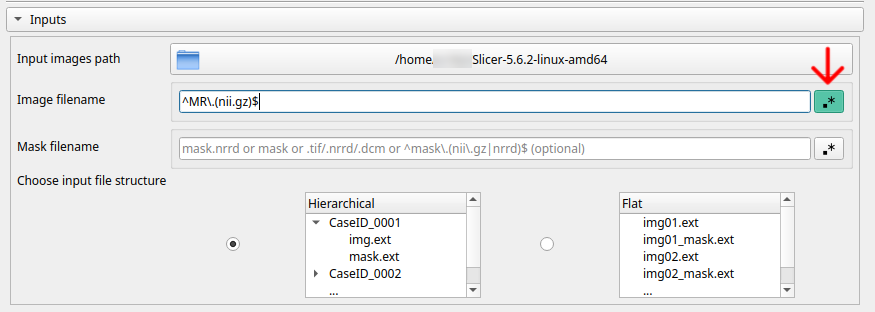
2. Specifies by what name, substring or with a regular expression how ImageAugmenter can recognize images (CT, CT.nrrd, .nrrd, ^ct.(nii.gz)$)
3. If you also want to include masks/segmentations associated with the images, simply indicate the name, a substring or a regular expression with which ImageAugmenter can recognize them (mask, mask.nrrd, _label, ^mask.(nii.gz)$)
Releases after v1.0.4 support regex mode for both text fields to match more precise patterns.
4. Indicates what type of hierarchy the images respect. This will allow ImageAugmenter to maintain the original dataset hierarchy when saving. There are two options: hierarchical (use this setting if your images are grouped by sample and each sample is a folder) or flat (use this setting if your images/masks are in a single folder and the sample name matches the file name)
5. Choose where you want to save the augmented samples
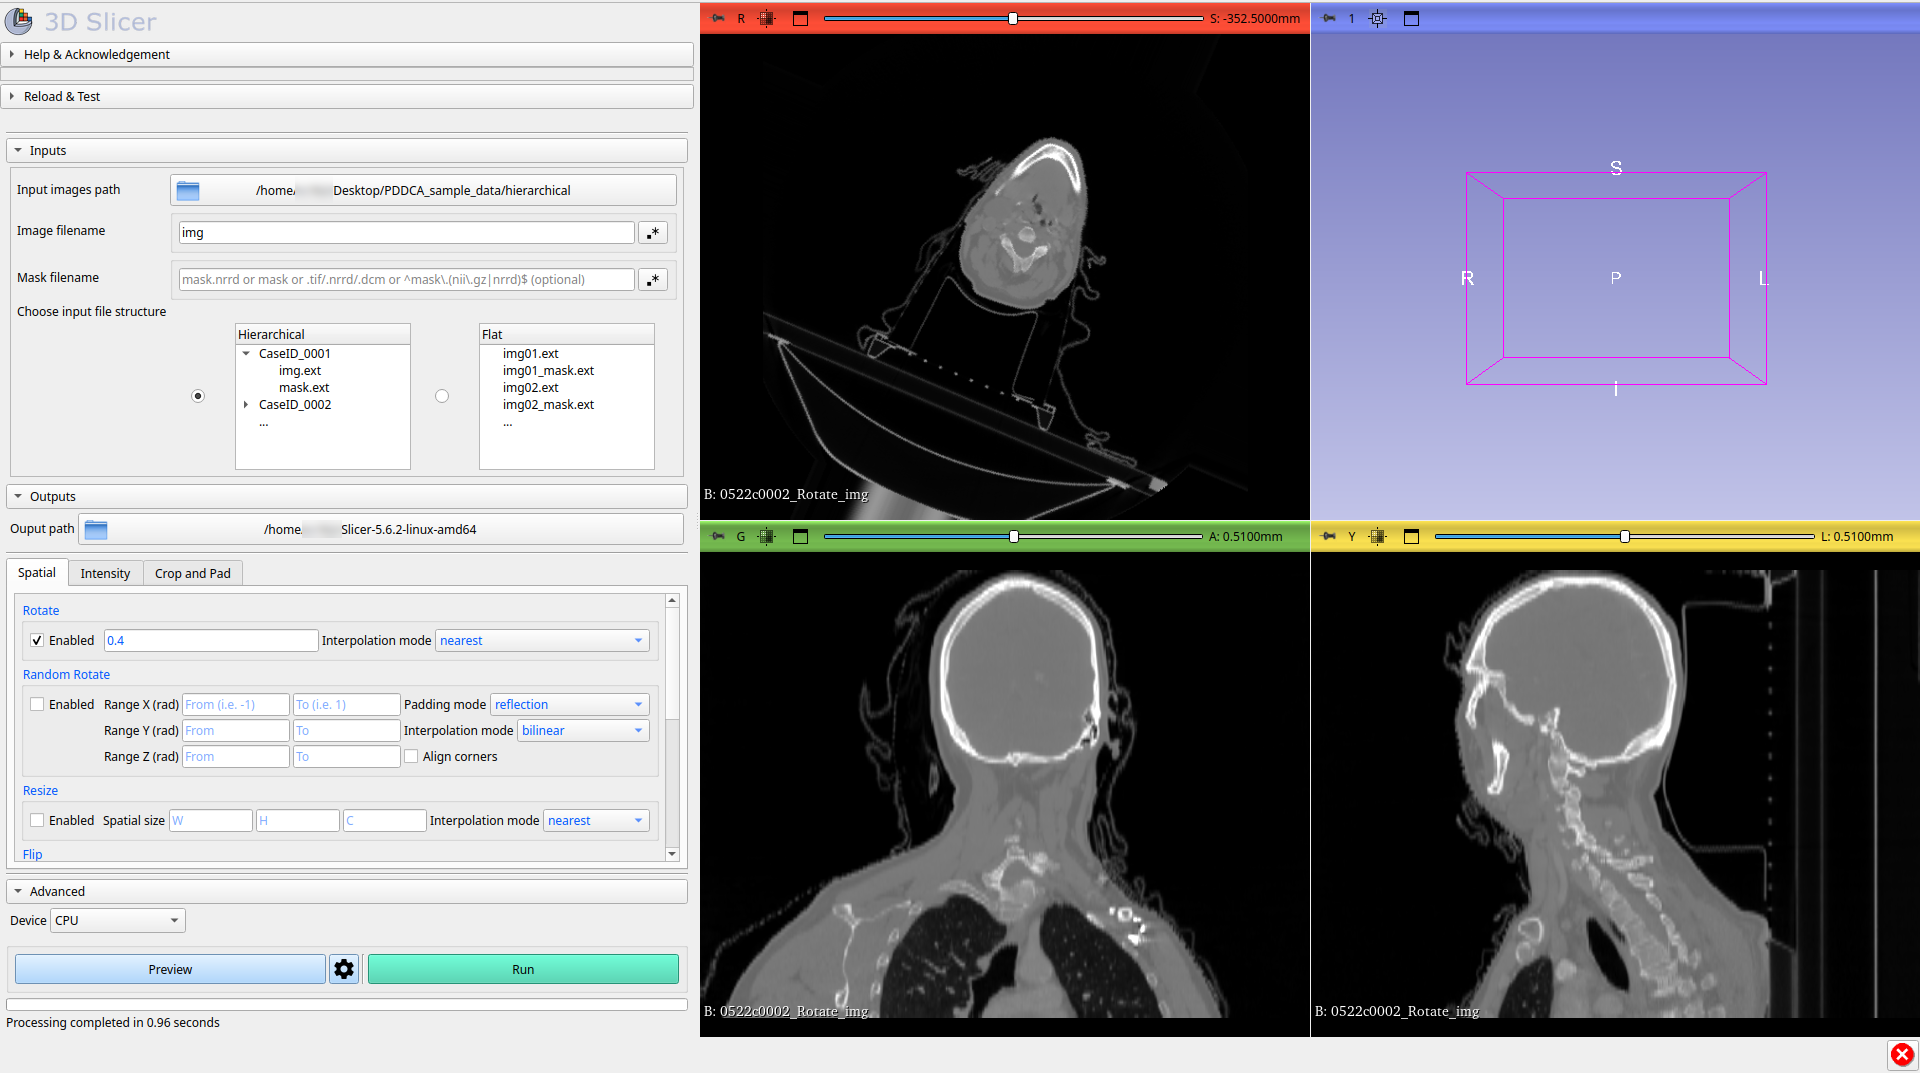
6. Enable as many transformations as you want by specifying parameters for each transformation
|
|
|
7.1 Use the Preview button if you want to preview the final result on the first sample of the dataset directly into the Slicer scene, if you are not satisfied, change the parameters and request a new preview.
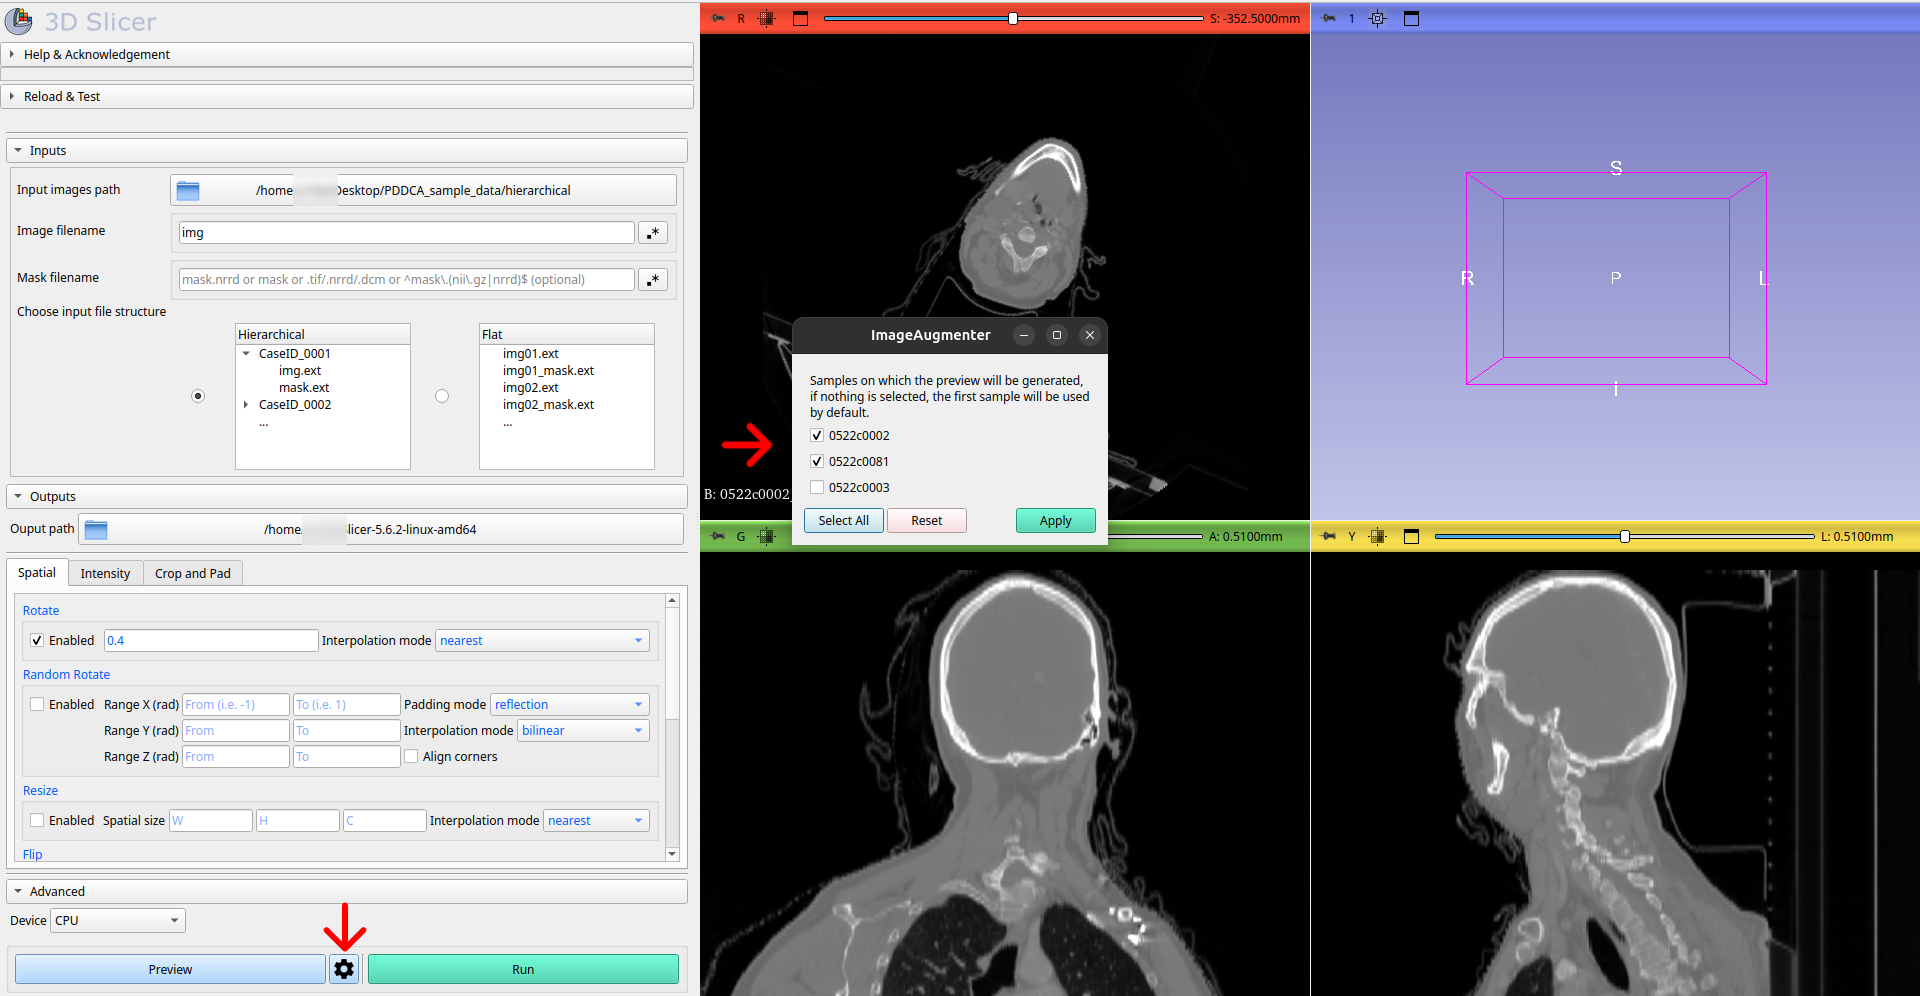
Pressing the Preview Settings button, will display all cases found by ImageAugmenter with the specified settings in a new window. You can then select all cases on which the preview should be generated. If no cases are selected, the transformation preview will only be generated on the first case.
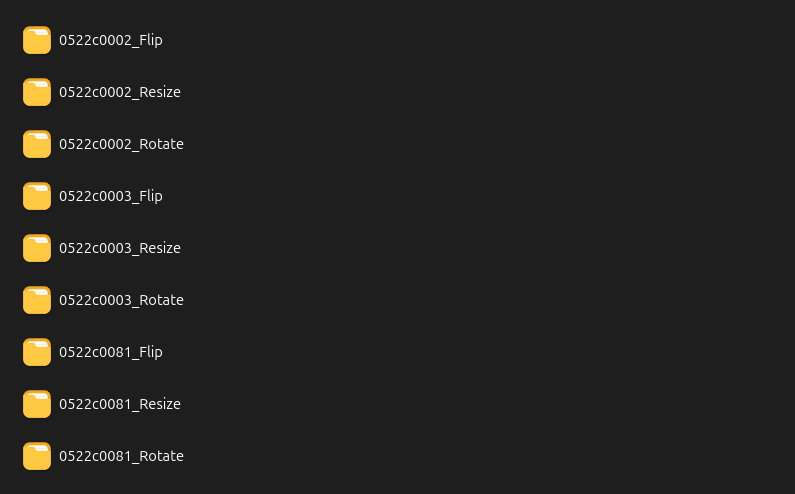
7.2 If you are satisfied with the result, use the Run button to save the augmented samples in the folder chosen in step 5. The files will be saved respecting the input hierarchy, as in this sample: